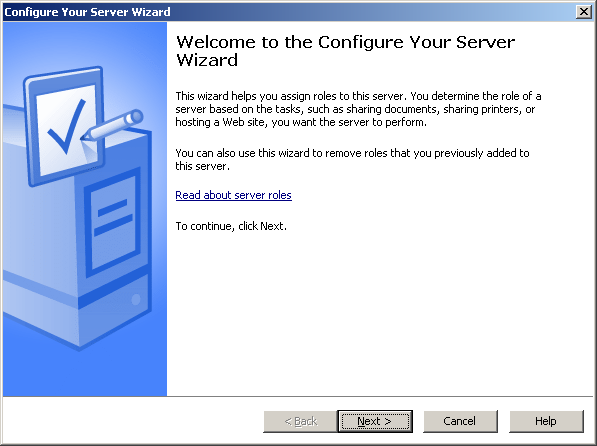
Than go to Start, click on Program then go to Administrative tools and click on Configure Your Server Wizard.
Click Next icon to continue installation.
After reading Preliminary steps click on Next.
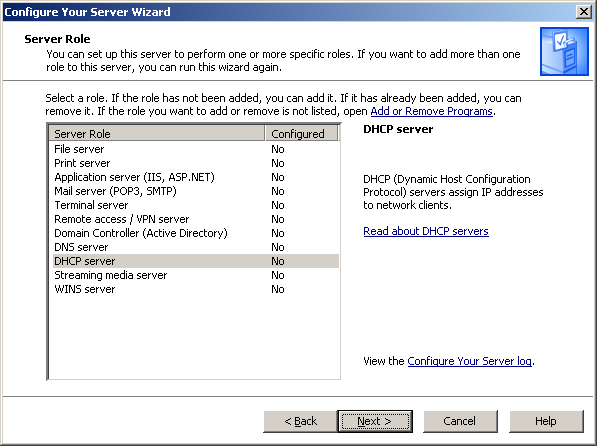
Then select DHCP to install and click Next.
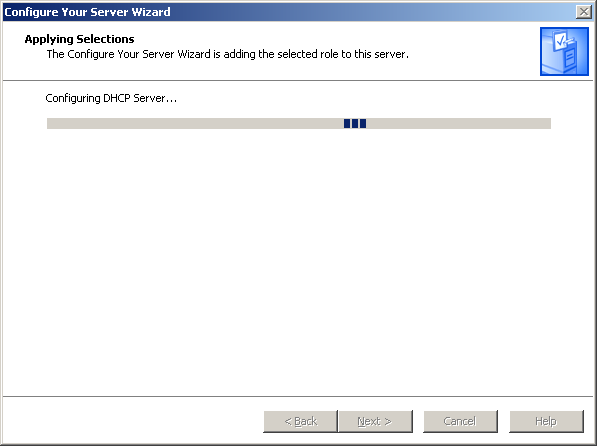
For Summary of Selections click Next.
Than system configuring Appling Selections.
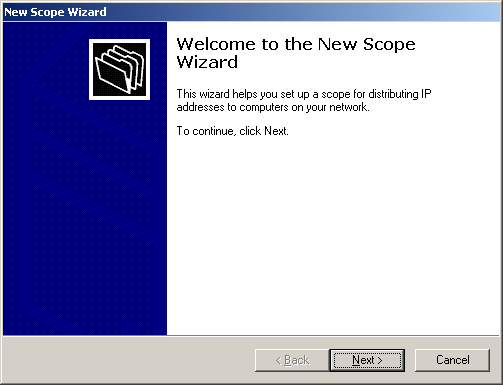
Than New Scope Wizard Screen will appear, click Next to continue Installation.
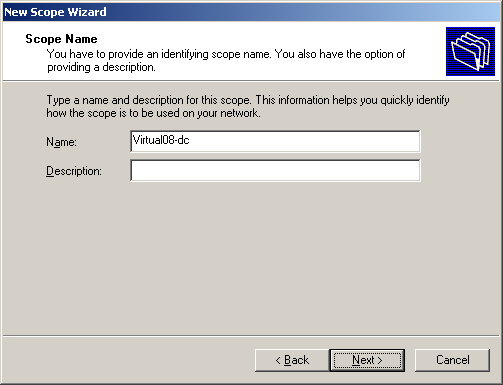
Enter Your DHCP server name and its Description and click Next.
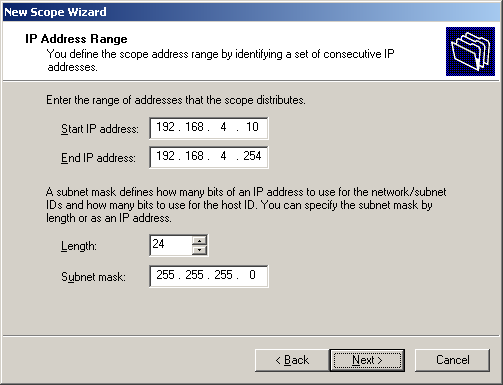
Enter the IP address range you want to allot and click Next.
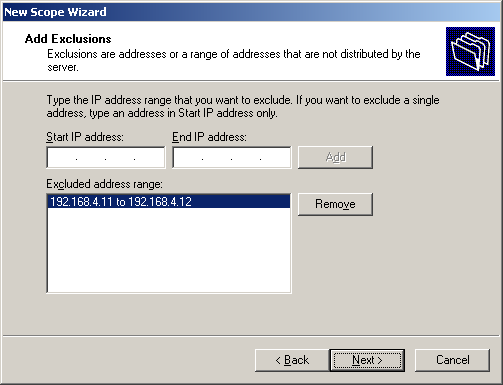
In next step you can reserve IP addresses you want not to allot to anyone
Fill the IP address from where you want to start from where you want to kept reserve.
After filling them click Add and then click Next.
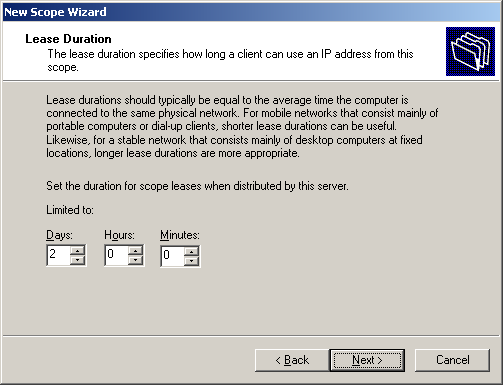
Then enter the lease days you want that client will use IP from this scope.
Click Next to continue.
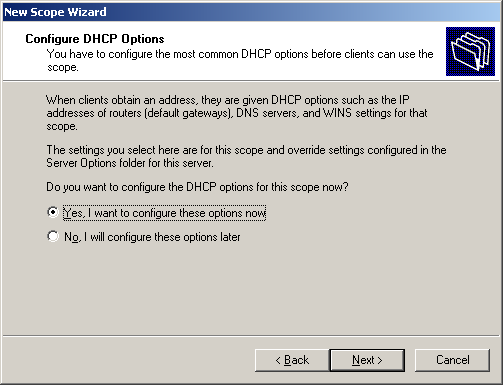
If you want to configure your DHCP server now than select Yes otherwise select No.
After that enter your Router IP address, click Add and click Next.
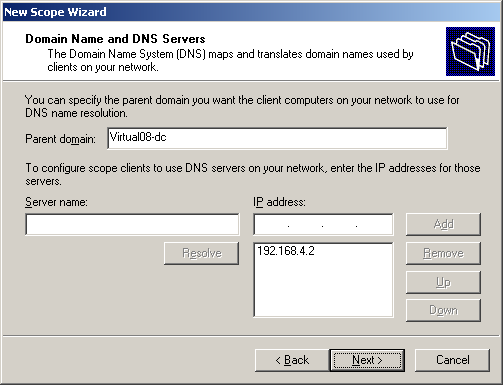
Enter Parent domain name and enter your DNS server IP address or just add the name of DNS sever and click Resolve and Add icon to enter the DNS IP address.
Click Next to Continue.
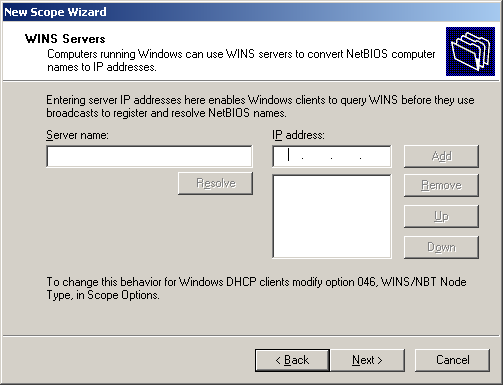
Enter the WINS server address if you have otherwise click Next to continue.
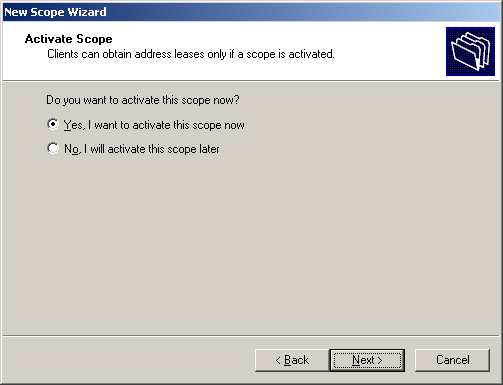
Select Yes if you want to active this scope otherwise select No.
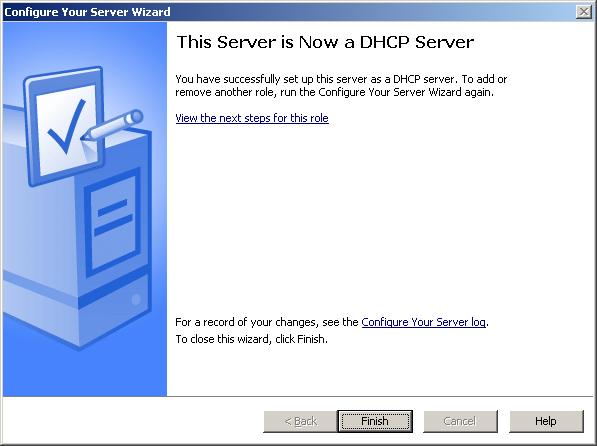
Click Finish to complete successful installation of DHCP.
Again click Finish to end Wizard. (This server is know DHCP server)